In this tutorial, let’s learn about the Cosmos DB hierarchy. Like most databases have structure, Azure Cosmos DB also has some hierarchical structure.
 |
| Cosmos DB account Hierarchy |
Account – This is the top level. To use Cosmos DB in Azure, you must first create an account.
Database - Within an account, you can create one or more databases. Think of a database as a big container where your data is stored.
Container – In a single database, you can create as many containers as needed.
Under a container, you can create items, user-defined functions, stored procedures, triggers, and more.
Also, you can directly create a container under a Cosmos account, even without first creating a Cosmos DB database.
Step 1: Creating Cosmos Account
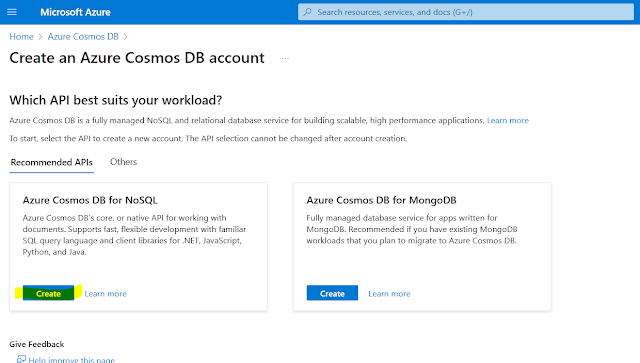
After signing in to the Azure portal, select the Cosmos DB resource.
 |
| Azure Cosmos DB resource creation |
Step 2: Select Cosmos NoSQL API
 |
| Select NoSQL API |
Step 3: Select Cosmos NoSQL API
Basic tab
Workload Type: Choose either Learning, Development, or Production. In this tutorial, I selected Learning.
Subscription and Resource Group: Specify your Azure subscription and the resource group you want to use.
Account Name: Enter a unique name for your Cosmos DB account. For example: test-cloudnerchuko.
Availability Zones: Set to Disable.
Location: Select South India as the region.
Capacity Mode: Choose Serverless.
Global Distribution tab
In global distribution, you can expand your data across several regions. Central India and South India form a paired region. You can also add more regions if needed.
Geo-redundancy: Default
Multi-region writes: Serverless mode doesn't support multi-writes.
 |
| Global Distribution |
Networking tab
There are two ways to connect to your Azure Cosmos DB account:
Public Access – This allows you to connect via public IP addresses or service endpoints. It's similar to accessing through the internet.
Private Access – This uses a private endpoint to connect through private IP addresses within your virtual network. It provides secure and controlled access to your Cosmos DB account.
 |
| Networking tab |
Connectivity method: Default -> All networks
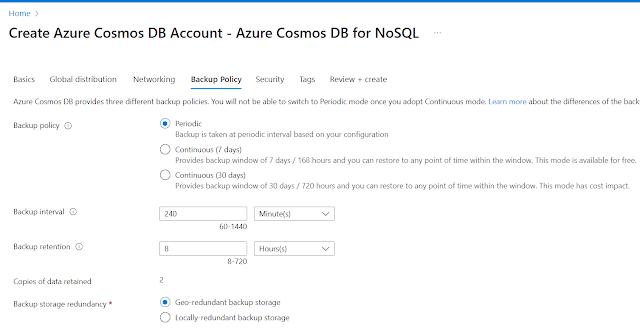
Backup Policy tab
 |
| Backup policy |
Backup policy: select Periodic
Backup interval: Default 240 minutes
Backup retention: 8 hours
Copies of data retained: 2
Backup storage redundancy: Global
Above values can be changed after creating your cosmos account.
Security tab:
 |
| Security tab |
Leave the Security tab with its default settings, then move to the Tags tab, which appears before Review + Create. You can use the Tags tab to assign a tag name to your resource.Review + Create tab
 |
| Review + Create tab |
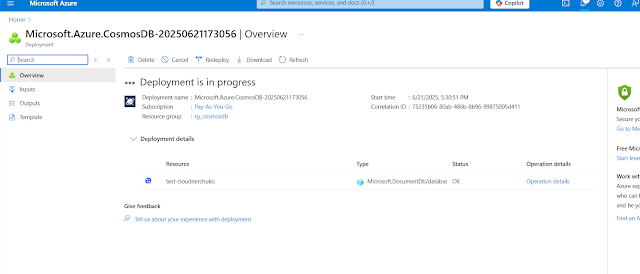
After clicking on create button, a new resource will appear after some time.
Deployment details while resource during creation:
 |
| Deployment Details |
After creating the resource,
 |
| Deployment success |
Step 4: Open Cosmos DB NoSQL API resource Overview tab
 |
| Cosmos DB NoSQL Overview tab |
📌 Overview Tab – Key Details:
Account Summary – Displays basic details like your account name, selected regions, and API type (e.g., NoSQL, MongoDB).
Throughput & Storage – Shows how many RU/s (Request Units per second) you're using and how much data is stored. Throughput doesn't apply in Serverless mode. Simply put, in serverless you only pay for what you use.
Geo-Replication – Indicates in how many regions your data is distributed and the current status of each.
Connection Strings – Shows the URI, keys, and connection strings that developers use to connect to the database.
Quick Links – Provides shortcuts to essential pages like Containers and Data Explorer.
Cosmos DB Endpoint Example: https://test-cloudnerchuko.documents.azure.com:443/
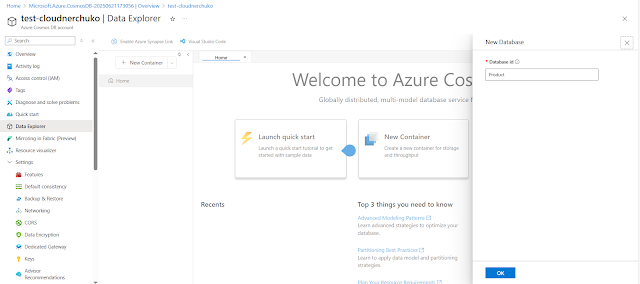
Step 5: Database creation
Creating a database in Cosmos DB NoSQL API is very easy:
 |
| Cosmos NoSQL API Database creation |
Step 6: Cosmos DB Container creation
 |
| Cosmos db container creation |
After the database is created, click on “+ New Container”. Then, provide a Container ID and a Partition Key. Click OK to create the container.
 |
| Container creation |
Step 7: UDFs, Stored Procedures, Triggers etc. creation
If you create Stored Procedures, Triggers, or User-Defined Functions (UDFs), they will appear under the container you selected.
 |
| UDFs, Triggers, SPs, Queries under container |


Comments
Post a Comment